Add Apple Maps to your website using a serverless function and host it on Netlify
I bet at one point in your developer career you were asked or wanted to implement an interactive map on your website. Interactive maps are great to visualize locations and routes for users and have replaced the need of using an old-school map helping us to navigate in the real world!
So you are now on your way to implement such a feature and the first thing you will do is search on google “How do implement an interactive map on a website” and probably the first few results will point you to use Google Maps. But what if I tell you that Google is not the only player in the game and there are different maps provider too!
In this blog post, we will be focusing on Apple Maps! Yeah, you heard correctly Apple Maps. “But doesn’t Apple Maps suck? Apple Maps on a website? I thought that only exists on iOS?” you might ask and the answers are as usual “it depends” and “yeah it exists!“.
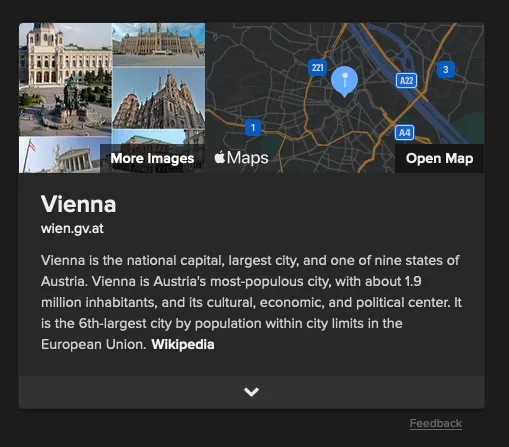
You know Apple has released Apple Mapkit for JS in 2015 and since that year you can implement Apple Maps on websites! The most popular service I can find using Apple Maps is DuckDuckGo. If you search “where is vienna” you will find a small map on the right of the search results using Apple Maps. If you click it, you will get redirect to a site which has a bigger map.
Okay now you know you could use Apple Maps on your website, but how do you make it work? Well, it is not as easy as it seems, because Apple handles the API key differently than Google Maps.
Usually when you want to use a service you will sign up on their site and generate an API key that you than can use. Apple instaed will give you a private key which you can use to generate Json Web Token (JWT) tokens that will be used to validate your access to Apple Maps. This is why we need backend code to hide this private key and therefore we will implement this with a serverless function.
In this post, I will show you how to get the credentials from Apple, create a small example using Apple Maps + serverless function, and finally deploy it using Netlify.
Prerequisites
- You will need to have a paid Apple Developer membership, otherwise, you will not be able to download the credentials for using Apple Maps
- A free Netlify account to be able to deploy the final website
Sadly you will need to be in Apple’s Developer program if you want to follow along, if you can’t follow along you may still check out the final version here and take a look at the code on GitHub.
Obtaining the credentials from Apple
I did not figure out these steps on my own and they can be found on Apple’s website too.
First head over to the account page of your Apple Developer membership. We need to create two things: Maps ID and a MapKit JS private key.
Maps ID
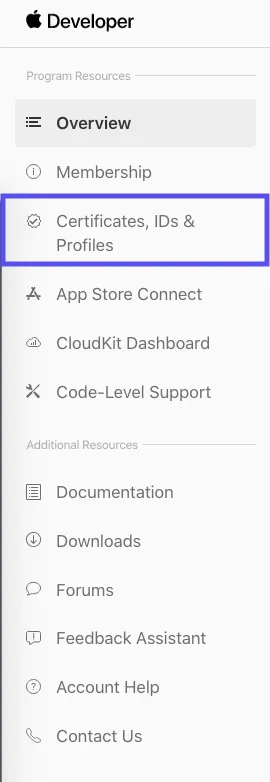
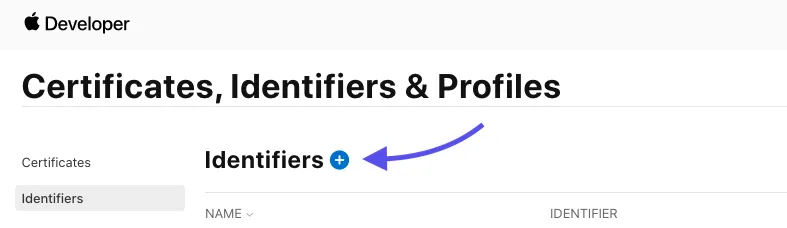
In the sidebar select Certificates, Identifiers & Profiles and than Identifiers and click the small plus icon.
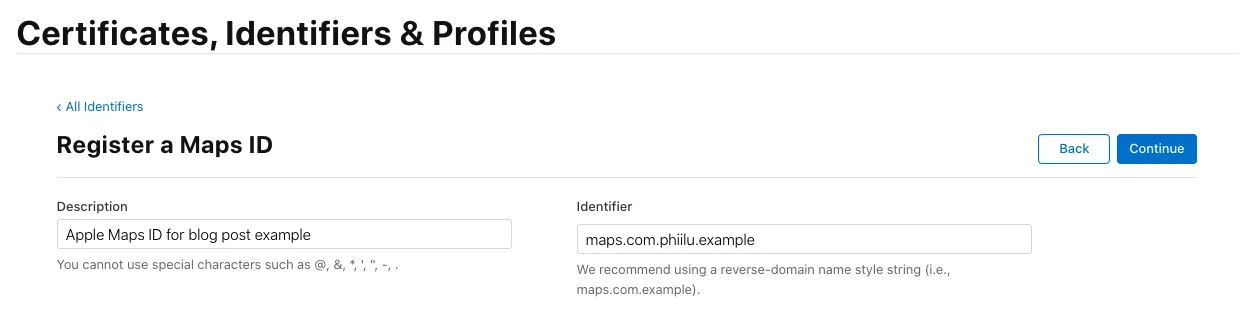
Next, give it a description and an identifier using a reverse domain like maps.com.phiilu.example and click Continue and Register.
Now you have created a Maps ID which we will need for our Private Key.
MapKit JS private key
Back on the Certificates, Identifiers & Profiles overview page select Keys and create a new key by selecting the small plus icon.
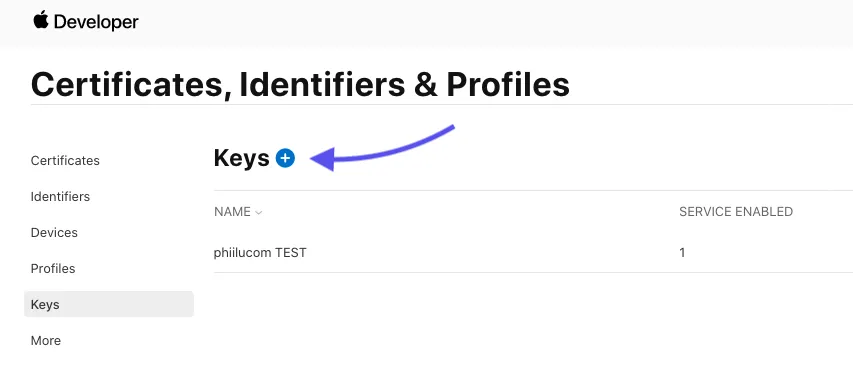
Give the Key a name and you should see MapKit JS as an option in the services. If not then you did not create a Maps ID.
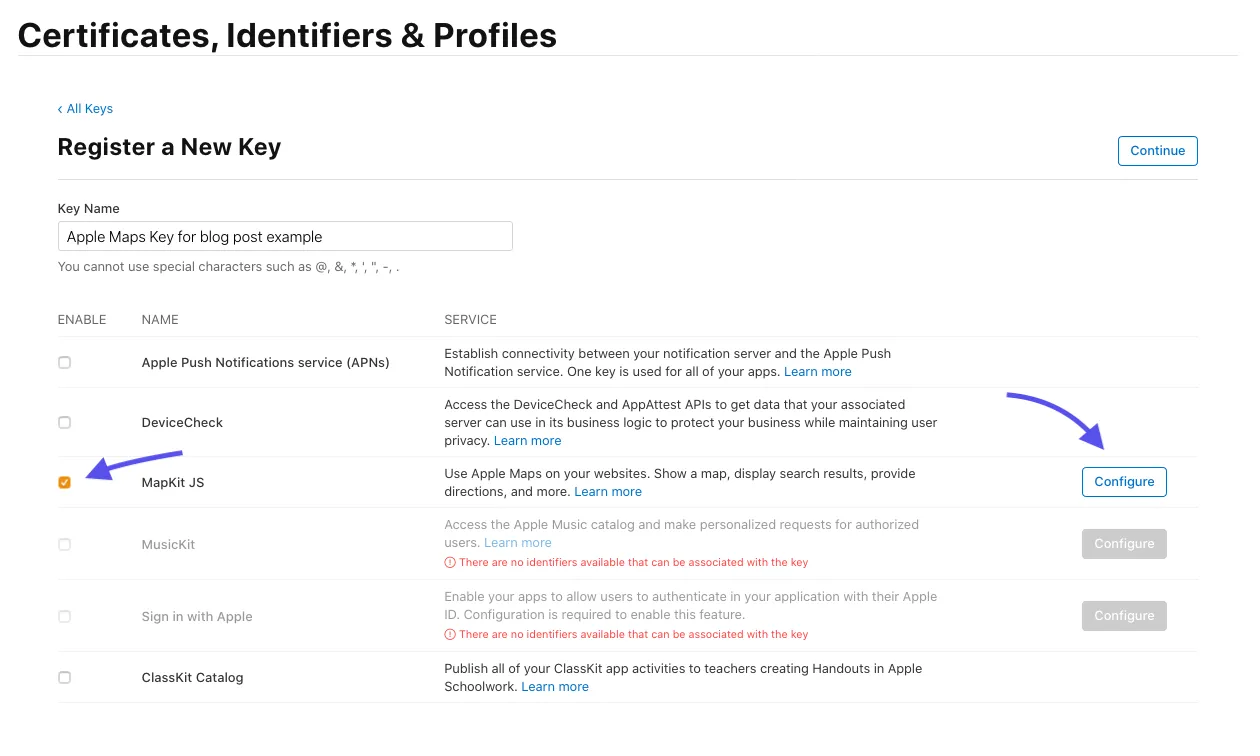
Next select Configure next to the MapKit JS, select the previously created Maps ID, and click Save. Review your settings and click Continue.

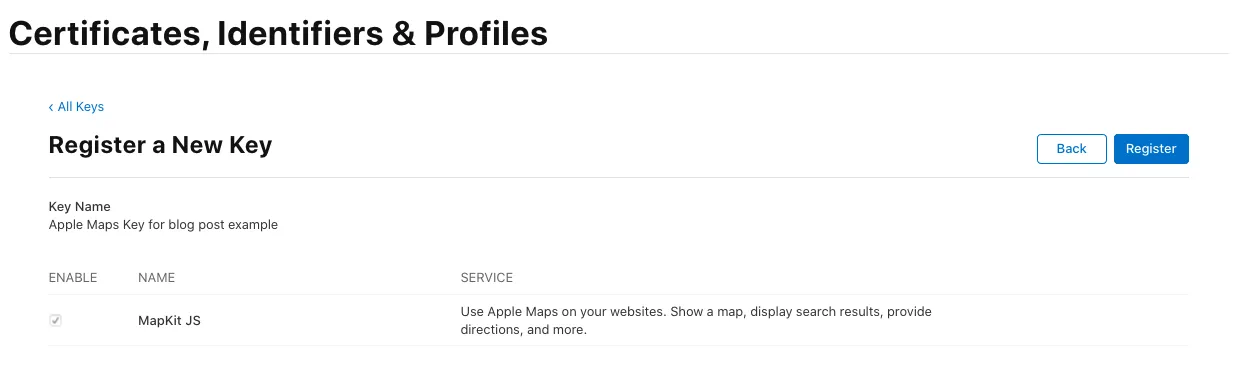
You will see a summary of the services you enabled for this key and can register your key with Register.
Finally, your key is registered and you can download it! As the warning says this is a ONE TIME DOWNLOAD and you won’t be able to download the key again.
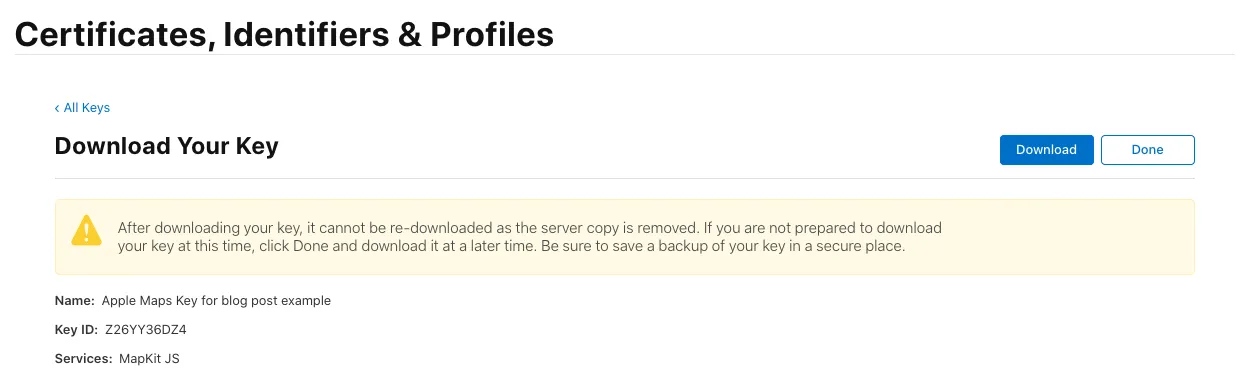
You will download a file named AuthKey_Z11AA36DZ4.p8 or similar and if you open this you will find 6 lines of text, which will be your private key.
This key should ALWAYS be kept private and never be leaked to the public, hence why we need to create a serverless function to safely store the key in backend code.
Take note of the generated Key ID too, because you will need it later.
Team ID
The Team ID is already created for you, but you need to copy it from the top right next to your name.

Now that we have everything we need and we can start integrating Apple Maps on our website.
Setting up the development environment
This project is using the Netlify CLI, so you will need to install it globally using npm.
npm install netlify-cli -g
Next, you will need to clone the git repository and checkout the branch tutorial-start.
git clone [email protected]:phiilu/apple-maps-example.git
cd apple-maps-example && git checkout tutorial-start
To start the project you need to install the dependencies and run the development server.
npm install
npm start
When you open the browser at http://localhost:18080 you will see a simple styled website where we will be adding Apple Maps.
To keep it simple we will be using basic HTML, vanilla Javascript, and styles using Tailwind. It will be compiled using Parcel and the serverless functions can be tested locally using the Netlify CLI.
Project structure explained
Inside the project directory run the following command to list all folders and files.
tree -I 'dist|node_modules'
.
├── README.md
├── netlify.toml
├── package-lock.json
├── package.json
├── postcss.config.js
├── src
│   ├── functions
│   ├── index.html
│   ├── index.js
│   └── index.pcss
└── tailwind.config.js

2 directories, 9 files
Most of these files should not need explaining, but I will explain the most interesting ones.
netlify.toml
netlify.toml contains the configuration for Netlify and the Netlify CLI.
[build]
  command = "npm run build"
  functions = "src/functions"
  NODE_ENV = "12"
  publish = "/dist"

[dev]
  port = 18080
  publish = "/dist"
  command = "npm run dev"

[production]
  publish = "/dist"
  command = "npm run build"

[[redirects]]
  from = "/api/*"
  to = "/.netlify/functions/:splat"
  status = 200
It will tell Netlify where our serverless functions are, which Node.js version we want to use, which port we want the development server should run, how it can start our project in development mode, and redirects all requests from /api/* to the correct Netlify function.
src directory
src will contain all of the code we write. It contains the functions directory where we will be putting our serverless functions and our HTML, Javascript, and CSS files.
Tailwind
A utility-first CSS framework for rapidly building custom designs. - tailwindcss.com
Lots of the other files you see are to configure Tailwind. I just like to use Tailwind to add styling to my projects, but we won’t be adding more styles, so you will not need to know how it works.
Adding Apple Maps to the website
Let’s start adding Apple Maps to the website! When you open the cloned repo and open up the index.html file you will see that there is already Apple MapKit pulled in from Apple.
<!-- index.html -->
<script src="https://cdn.apple-mapkit.com/mk/5.x.x/mapkit.js"></script>
This line will load the latest MapKit from Apple. You can find how Apple versions MapKit here.
Further down the file, you will find the div where we want to mount Apple Maps.
<div id="apple-maps" style="height: 800px" class="w-full rounded-md shadow-lg" />
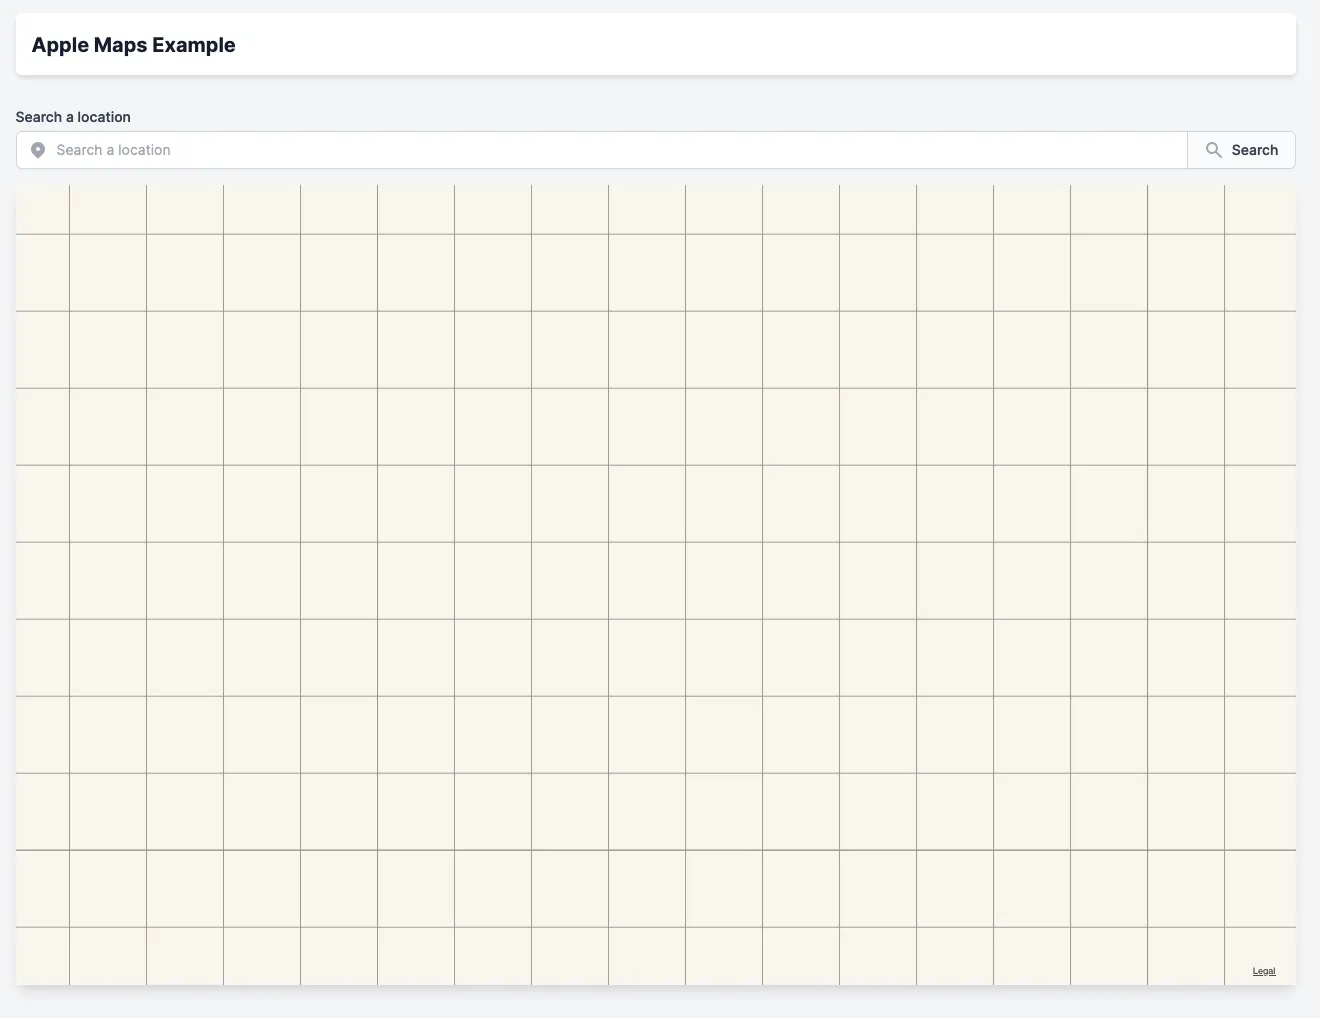
This div has set a height and some classes that will make it look a bit nicer. If you open up http://localhost:18080/ you should see a simple website with navigation, a search box, and a blank space with a shadow around.

Now we want to add Apple Maps to this div, so open up the index.js file and paste this code:
mapkit.init({
  authorizationCallback: function (done) {
    fetch('/api/token')
      .then((res) => res.text())
      .then(done);
  },
  language: navigator.language || navigator.userLanguage
});

const center = new mapkit.Coordinate(48.210033, 16.363449); // Vienna
const map = new mapkit.Map('apple-maps', {
  center,
  cameraDistance: 15000
});
Now you should see a Map showing up in your browser… well not really. If you have a look at the console you will see an error and a warning.

Let’s debug our code and find out why it is not working.
You can see, we are mounting the map correctly using the id of apple-maps that we specified in the index.html file.
But before mounting we are calling mapkit.init(...) and fetching a new token from /api/token. This token is how Apple Maps verifies that this site has access to Apple Maps, but we did not write any code that would generate such a token yet.
In the next section, we will write the serverless function that will generate our token for Apple Maps.
Creating a serverless function to create a valid JWT token for Apple Maps
It’s time to take our generated private key and use it to generate JWT tokens for our frontend!
Configure .env with our obtained secrets
Before working on the serverless function we will need to create a .env file in the root of your project and put in our obtained credentials.
MAPS_KEY_ID=<MAP_KEY_ID>
APPLE_TEAM_ID=<TEAM_ID>
APPLE_MAPS_KEY=<PRIVATE_KEY>
SITE_ORIGIN=http://localhost:18080
Put in your information that you saved from the previous sections.
APPLE_MAPS_KEY is a little special, because we downloaded it as a file. You will need to copy the contents of the file and replace all line breaks with \n. Your APPLE_MAPS_KEY entry should look like this:
APPLE_MAPS_KEY="-----BEGIN PRIVATE KEY-----\nMIGTAgEAMBMAyyqGSM49AgEGCCqGSM49AwEHBHkwdwIBAQQg698QaJcP/pbDrXHE\nSzt8Igy6KgeUm2ky1LZZoBDcVzygCgYI2oZIzj0DAQehRANCAAST56qF4NUi1v0Y\nrWfvSNVbSdQjT7M6syC7bJYiB5zTlwzzGeIU2kilRNY7p3KlUnC5QGISGHjN3FL+\n7wjrPBNa\n-----END PRIVATE KEY-----"
Don’t worry, this is not my real private key
Your .env file should look something like this:
MAPS_KEY_ID=AAAAAAB994
APPLE_TEAM_ID=1234A8E9Z5
APPLE_MAPS_KEY="-----BEGIN PRIVATE KEY-----\nMIGTAgEAMBMAyyqGSM49AgEGCCqGSM49AwEHBHkwdwIBAQQg698QaJcP/pbDrXHE\nSzt8Igy6KgeUm2ky1LZZoBDcVzagCgYI2oZIzj0DAQehRANCAAST56qF4NUi1v0Y\nrWfvSNVbSdQjT7M6syC7bJYiB5zTlwzzGeIU2kilRNY7p3KlUnC5QGISGHjN3FL+\n7wjrPBNa\n-----END PRIVATE KEY-----"
SITE_ORIGIN=http://localhost:18080
Writing the serverless function
Create a token folder inside the functions folder and open it in your editor. Next scaffold a package.json using npm inside the token folder.
npm init -y
As I already mention we need to generate JWT tokens, so we will be using the jsonwebtoken package.
npm i jsonwebtoken
Now create a file named token.js and paste this code:
const jwt = require('jsonwebtoken');

const origin = process.env.SITE_ORIGIN;
const privatekey = process.env.APPLE_MAPS_KEY.replace(/\\n/gm, '\n');
const keyid = process.env.MAPS_KEY_ID;
const issuer = process.env.APPLE_TEAM_ID;

exports.handler = async function (event, context) {
  const token = jwt.sign(
    {
      origin
    },
    privatekey,
    {
      algorithm: 'ES256',
      expiresIn: '1d',
      keyid,
      issuer
    }
  );

  return {
    statusCode: 200,
    body: token
  };
};
This simple function will generate a JWT token that is signed using your private key. The private key needs to replace the \\n with real \n, because Netlify somehow adds this automatically. I found the solution through this comment on GitHub.
The token will be valid for 1 day and will only work on the website configured in SITE_ORIGIN. You can change these options if you want and adjust them to your needs.
Apple has documented what each field is and what is used for at their documentation.
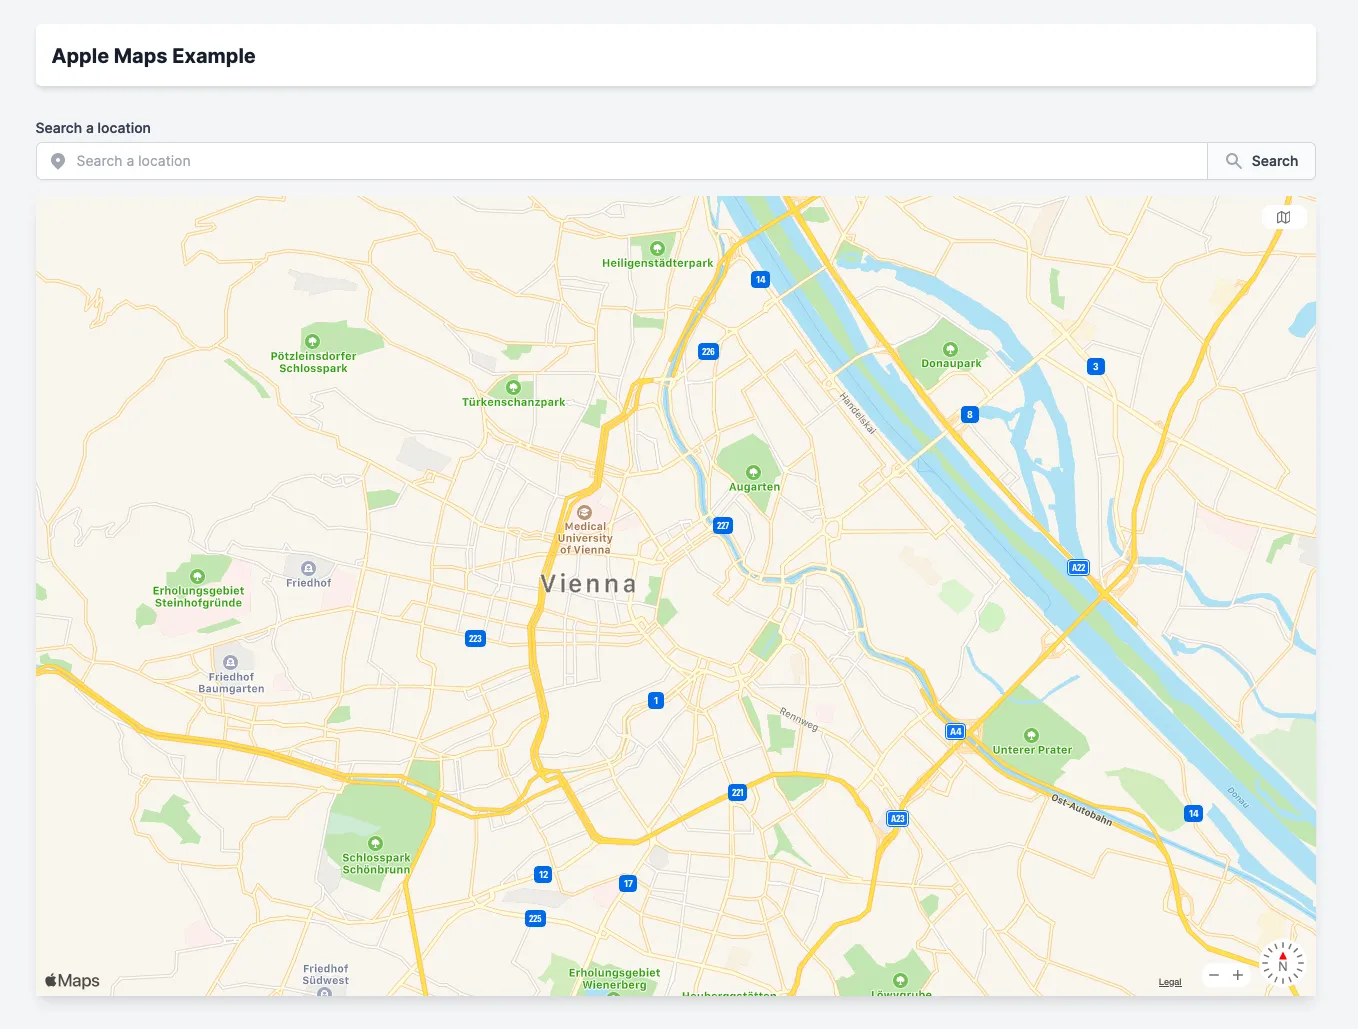
Restart your development server and open up http://localhost:18080/ and you should see a map with the center being Vienna 🥳
Deploy the website to Netlify
Now that our Map is working we want to publish our little project on Netlify and we will do this using the Netlify CLI that you already know.
If you did not login to Netlify using the CLI you will have to do this first.
netlify login
Next, go to the root of your project directory and run netlify deploy. This will walk you through and create the site on Netlify.
netlify deploy
This folder isn't linked to a site yet
? What would you like to do? +  Create & configure a new site
? Team: Florian Kapfenberger's team
Choose a unique site name (e.g. isnt-phiilu-awesome.netlify.app) or leave it blank for a random name. You can update the site name later.
? Site name (optional): apple-maps-example

Site Created

Admin URL: https://app.netlify.com/sites/apple-maps-example
URL:       https://apple-maps-example.netlify.app
Site ID:   44aa1f3e-f887-47e0-bf55-4c80f2ec01ab
Deploy path:        /Users/florian/Code/privat/projects/apple-maps-example/dist
Functions path:     /Users/florian/Code/privat/projects/apple-maps-example/src/functions
Configuration path: /Users/florian/Code/privat/projects/apple-maps-example/netlify.toml
Deploying to draft URL...
✔ Finished hashing 10 files and 1 functions
✔ CDN requesting 9 files and 1 functions
 ›   Warning:
 ›   {}
 ›
    TypeError: Cannot read property '0' of undefined
As you can see I got an error the first time, so I reran the script and it worked!
netlify deploy
Deploy path:        /Users/florian/Code/privat/projects/apple-maps-example/dist
Functions path:     /Users/florian/Code/privat/projects/apple-maps-example/src/functions
Configuration path: /Users/florian/Code/privat/projects/apple-maps-example/netlify.toml
Deploying to draft URL...
✔ Finished hashing 10 files and 1 functions
✔ CDN requesting 9 files and 1 functions
✔ Finished uploading 10 assets
✔ Deploy is live!

Logs:              https://app.netlify.com/sites/apple-maps-example/deploys/5f7b795ed6d83e3ab0a3f4a2
Website Draft URL: https://5f7b795ed6d83e3ab0a3f4a2--apple-maps-example.netlify.app
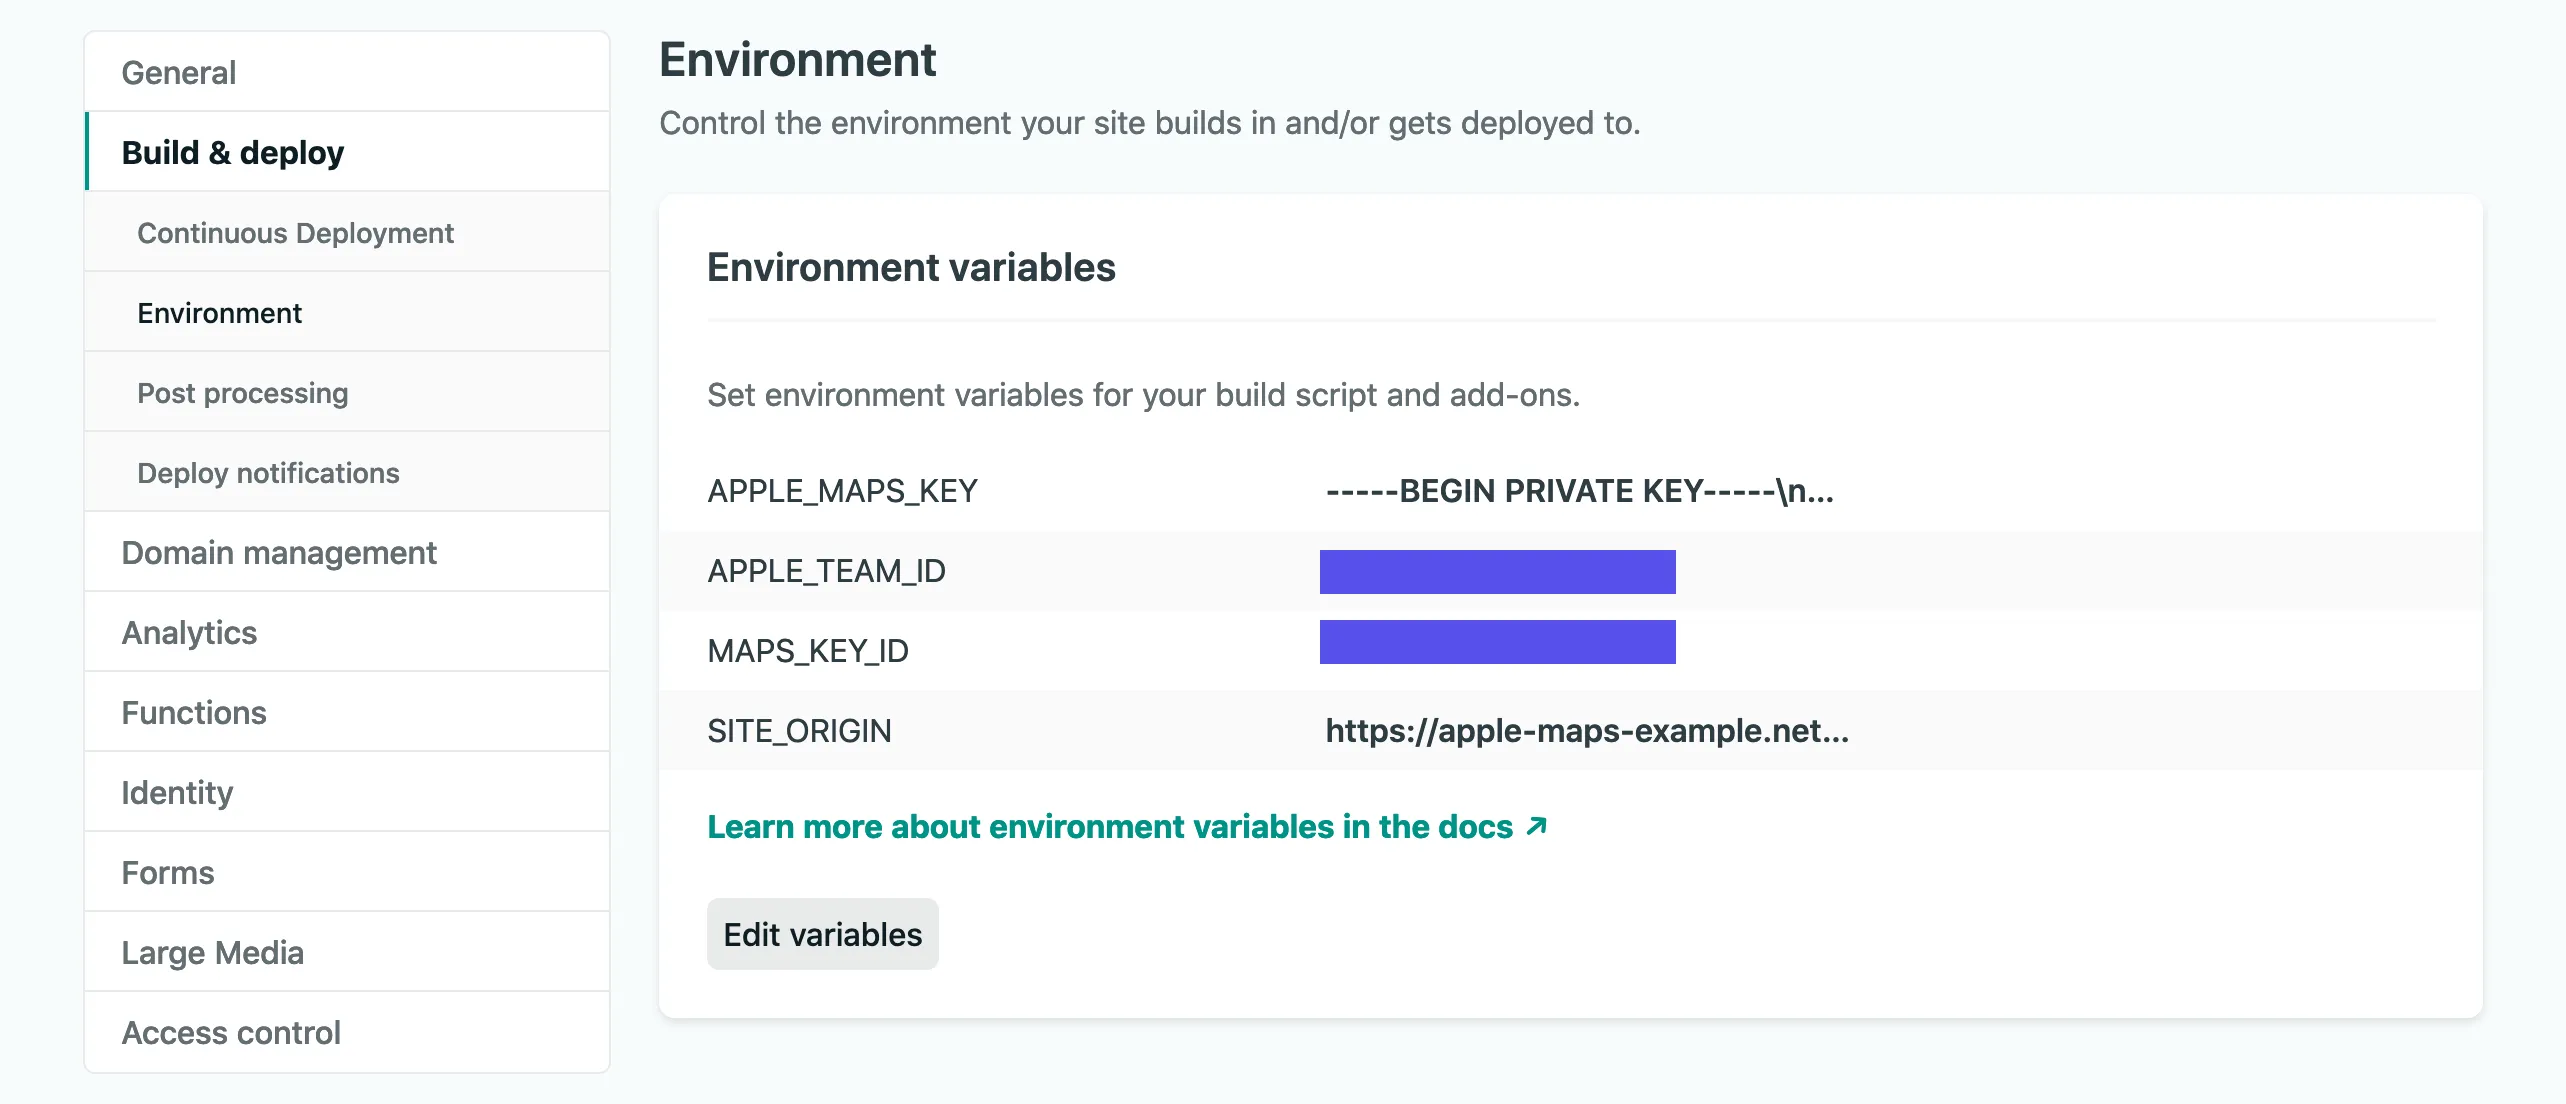
Our site may be deployed, but it is still not working, because we need to configure the environment variables in Netlify first.
Open up netlify.com, log in and go to the Build & deploy settings of the created project and add the environment variables from your .env file.
The last step is to deploy your project again, but this time with the --prod flag.
netlify deploy --prod
Your project is now live and you can visit it at the URL the Netlify CLI displays you or you can check out mine at https://apple-maps-example.netlify.app/
Adding a Searchbox using Apple Maps (optional)
For now, we just displayed a map but did not interact with it. In this section, I want to show you how you can easily search for cities and transition to them using just a few lines of code.
Open up index.js and append the following lines to it:
// index.js

const search = new mapkit.Search({
  language: navigator.language || navigator.userLanguage,
  getsUserLocation: true,
  region: map.region
});

const searchFormElement = document.getElementById('search-form');
const searchBoxElement = document.getElementById('search-box');

searchFormElement.addEventListener('submit', (e) => {
  e.preventDefault();
  const query = searchBoxElement.value;
  if (query) {
    search.search(query, (error, data) => {
      console.log(data);
      if (error) {
        console.log('Error', error);
        return;
      }
      map.setRegionAnimated(data.boundingRegion);
    });
  }
});
Using new mapkit.Search(...) we can create an instance of Search and use it to search for locations on the map.
The document.getElementById(...) lines will be used to get references to the form and input elements of the page.
After we have the reference we can add an event listener for the submit event on the form. We prevent the default even, which would reload the page and get the text from the searchBoxElement.
Next, we perform the search using search.search(...). The first argument is the query and the second one will be a callback when the request has finished. If we don’t have an error we will use map.setRegionAnimated(data.boundingRegion) to transition to the found location on the map.
Try it out! Open up http://localhost:18080/ or https://apple-maps-example.netlify.app/ and search for a city like Berlin and press enter. You will see the map transition to the center of Berlin.
If it works, you can deploy your changes with netlify deploy --prod.