Create your first VPS on Vultr
This guide is meant for beginners, who have never created a VPS before
Creating a VPS is really straightforward. I have chosen Vultr* as my VPS provider, because they offer great performance backed by benchmarks and have great support. There are also other VPS providers out there like DigitalOcean or Linode, but this article focuses just on Vultr. Just to name a few of them.
Create your account
First of all you need to create an account* on Vultr.
If you signup for an account using my affiliate link ending with * you will get 100$ coupon for Vultr. Be aware that the unused portion of $100 credit expires after 30 days.
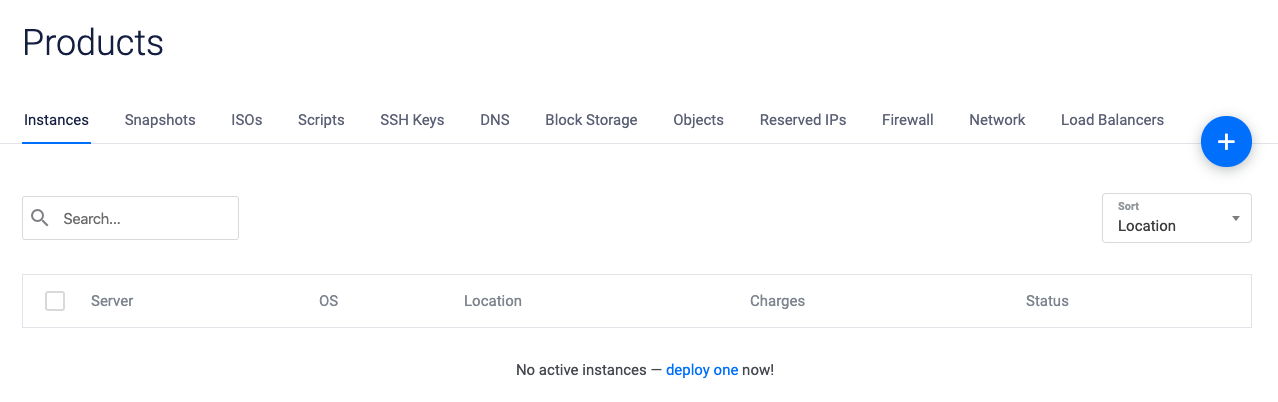
Create your VPS
After you are logged in, you will see the following Dashboard. Press on the blue plus button to create a new server.
Select your server type
Next you need to select your server type from the 4 existing ones.
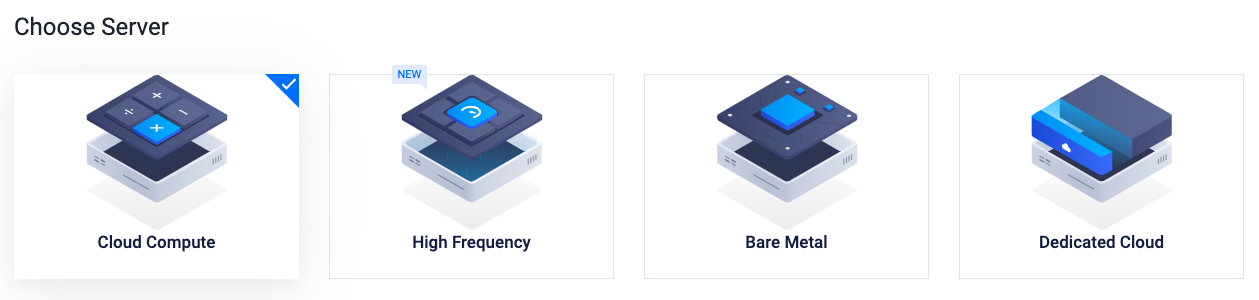
Cloud Compute
The most common VPS type.
Our high performance compute instances are perfect for your web application or development environment.
High Frequency
If you need even better performance.
Instances are powered by high clock speed CPU’s and NVMe local storage to power your most demanding applications.
Bare Metal
Sometimes also called Root servers. It’s like if you would own a physical server, but located somewhere else.
Stay in full control of your environment with high performance single-tenant dedicated servers.
Dedicated Cloud
Kind of like Bare Metal, but not with dedicated hardware just for you, but with dedicated resources.
Say goodbye, noisy neighbors! Deploy cloud instances with dedicated CPU, SSD drives, and RAM just for you.
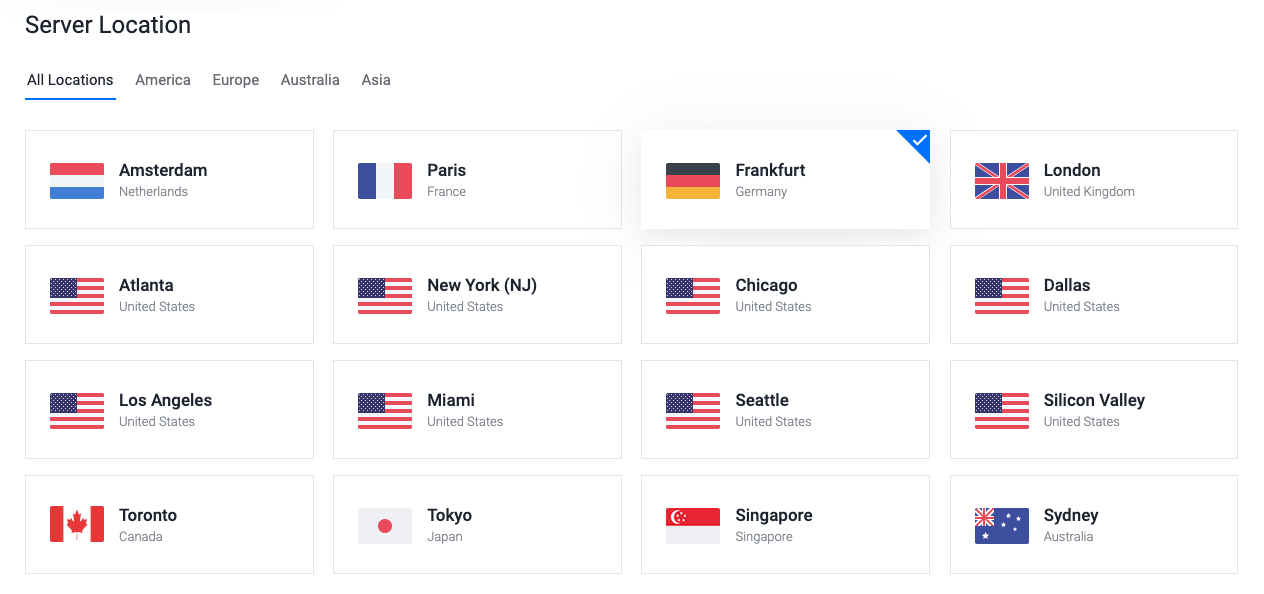
Select a server location
Depending where you live, you can select a region where your server should be located.
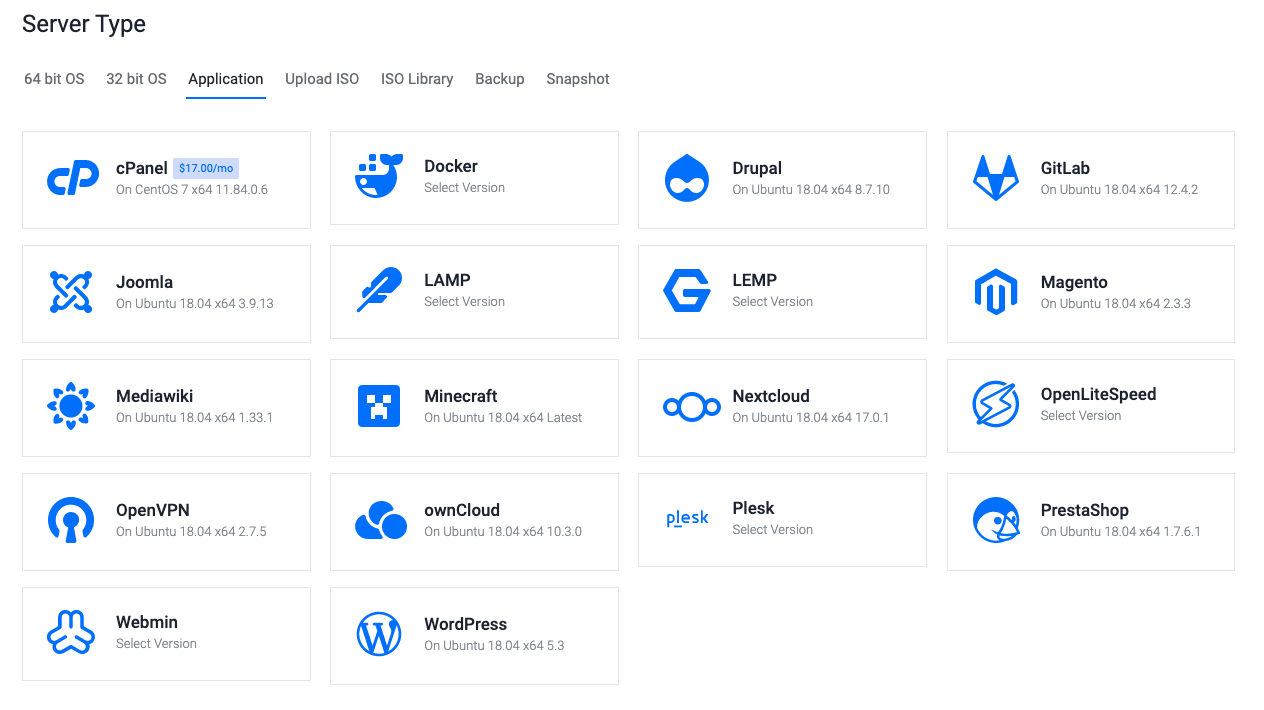
Select a operating system
In this step you can select your operating system (OS) for the server. I am most familiar with debian based OS like Debian or Ubuntu. Make sure to select a Long-term support (LTS) version of Ubuntu, to get security updates for 5 years after the initial release.
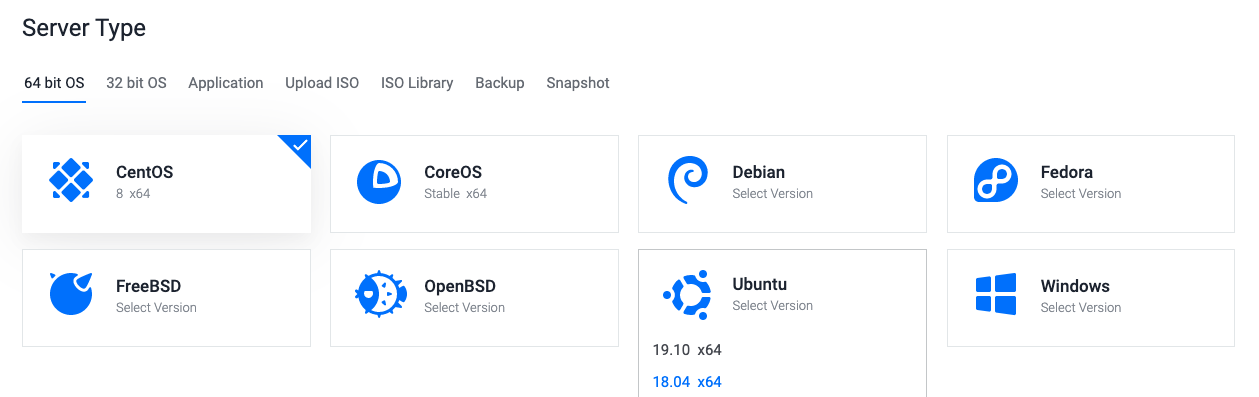
Vultr also has images with preinstalled application that could be used. If you don’t find your OS on Vultr, they also support to upload your own ISO file.
Select the specs of your server
Now comes the most important part. In this step you have to decide how much resources do you need.
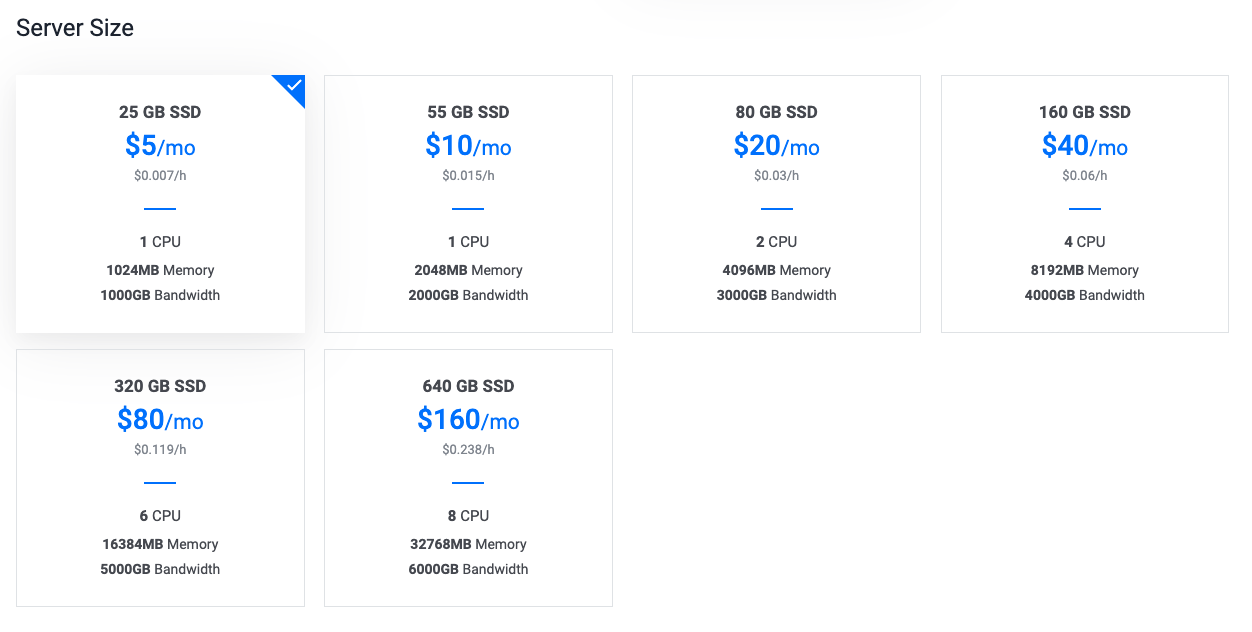
For small websites or web apps the 5$ instance should be enough to get started. The 10$ instance is probably a good choice if you also need to host a database with PostgreSQL or MySQL.
If you ever think you current instance is sweating and can’t handle the load anymore, Vultr allows to upgrade your server to better plan with just 1 click!
Deploy your server
Last but not least you can give your server a hostname. After that you get a summery and you can press “Deploy Now” to create your server.

Server overview
After some time your new server should be visible in the dashboard.

Vultr will send you an Email with the IP of the server and how you can connect to it.

Connecting to the server
When you click on the server in the dashboard you will find an overview and more settings to interact with it.
You can copy the password for the root user using the copy symbol.
If you are using Windows you need to enable Windows Subsystem for Linux (WSL) or download Putty in order to connect to the server.
On a Linux or macOS (or Windows 10 with WSL) system you can just open the Terminal application and connect via SSH.
ssh [email protected]
The authenticity of host '136.244.81.25 (136.244.81.25)' can't be established.
ECDSA key fingerprint is SHA256:E4VbM7b7i2jZO8aBgKSL1jfh6Td9Gv7TTswsSmGHc70.
Are you sure you want to continue connecting (yes/no)? yes
Warning: Permanently added '136.244.81.25' (ECDSA) to the list of known hosts.
[email protected]'s password:
Welcome to Ubuntu 18.04.3 LTS (GNU/Linux 4.15.0-74-generic x86_64)

 * Documentation:  https://help.ubuntu.com
 * Management:     https://landscape.canonical.com
 * Support:        https://ubuntu.com/advantage

  System information as of Wed Feb 12 13:01:10 UTC 2020

  System load:  0.0               Processes:           83
  Usage of /:   9.4% of 24.55GB   Users logged in:     0
  Memory usage: 12%               IP address for ens3: 136.244.81.25
  Swap usage:   0%

0 packages can be updated.
0 updates are security updates.

root@thanos:~#
Congratulations 🎉 you now have successfully created a server on Vultr* and connected to it!
For the next steps it is wise to update all the packages and secure your VPS by changing the default password and setting up some kind of firewall and blocking attackers with fail2ban. But this is a topic for a separate blog post 😄